In Target Groups and User Management, Part 1 we talked about target groups, setting up general groups, and user management settings. Now, we continue with adding new users to your account, securing the account, customizing permissions and a few more extras.
If you click on the Add New User button,
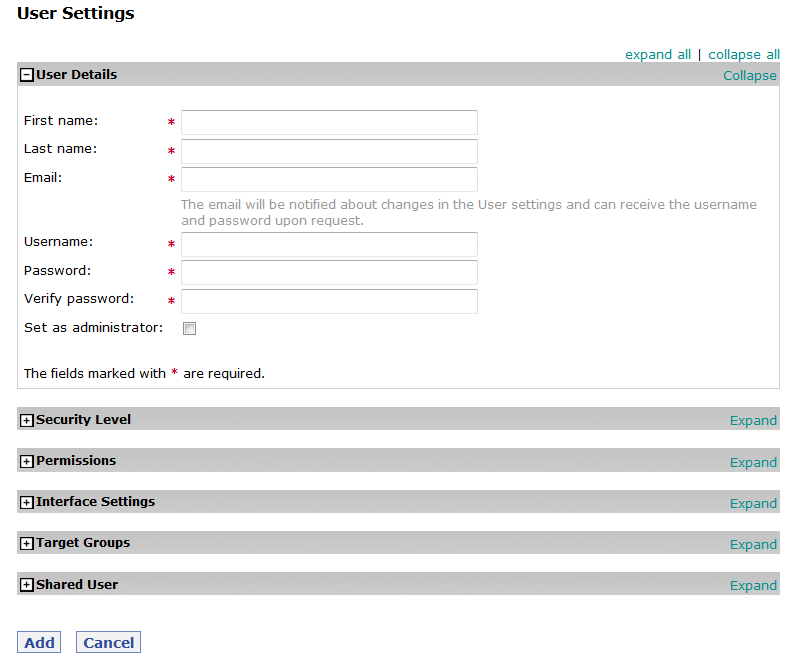
you will be prompted to enter the user details. You need to enter the names of the user and the email address as well as a username and a password. You can set the account to be administrative by checking the Set as administrator button checkbox.
You can also expand all user management sections or collapse them all using the buttons in the top right hand corner.
If you expand the Security level section,
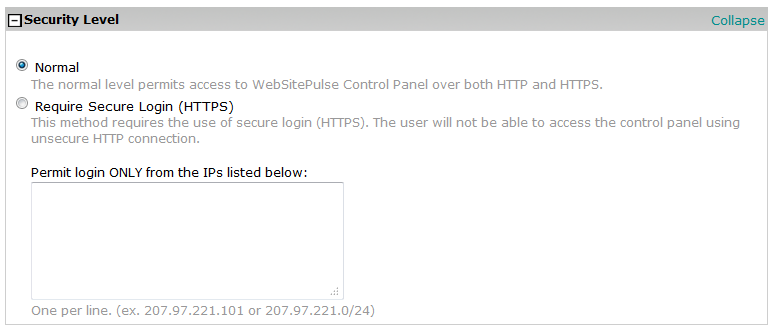
you will be able to choose the way the user can access their WebSitePulse’s control panel. The Normal level will allow both HTTP and HTTPS connections.
A more secure option here is to require secure login and the user will only be allowed to use HTTPS. By using an encrypted connection it is much harder for a third party to sniff the credentials and misuse them.
The most secure option is to allow access over HTTPS only and from specific IP addresses. You can enter the IPs in the text box and the user will be able to log in only from those addresses. We only allow one IP address per line but you can enter as many addresses as you like.
The permissions section,
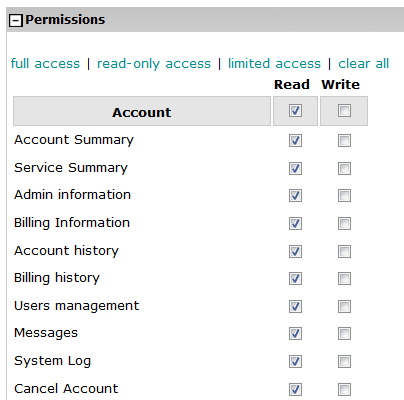
will let you set different read/write rights for the different sections of the control panel. So in case you want to limit the access of the user to your Billing History section, simply unselect the read/write checkboxes.
There are fast buttons to help you change the rights immediately. You can choose between full access, read-only access, limited access or you can remove all the permissions by clicking the clear-all link.
The limited access link will only remove the write permissions for the account section of your control panel. The full access option will give you read / write permissions for all sections and the read-only option will leave just the read permissions for all sections.
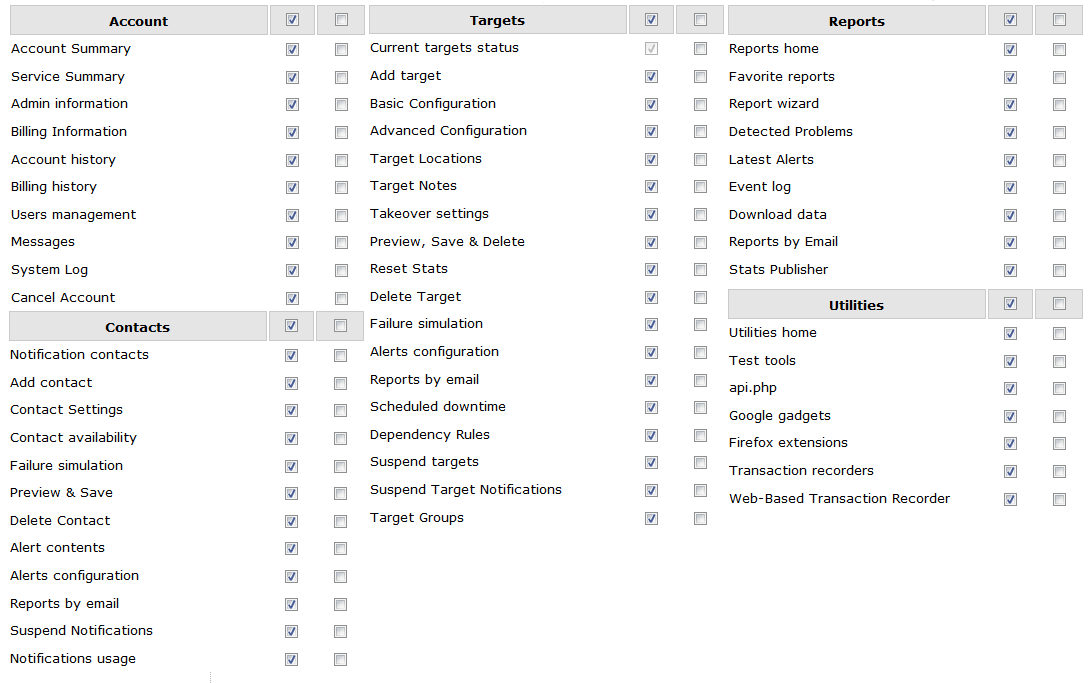
You can always customize the permissions yourself. The permissions are separated into five different groups taking into account the top menu of the control panel. You have the Account, Contacts, Targets, Reports and Utilities groups. You can limit the access only to specific services or reports for example.
In the interface settings section,
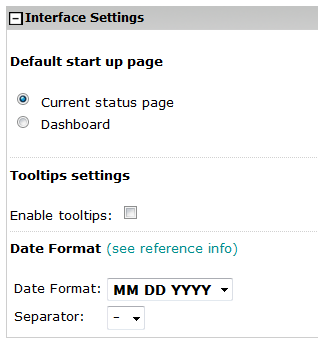
you can choose what your default start page will be. By logging in, you can directly go to the current status page or the Dashboard page.
Enable the tooltips, and you will get additional information when the mouse pointer goes over a target label for example.
Since most countries have different date formats you can select from 6 different options:
|
mm/dd/yyyy |
(example 01/21/2013) |
|
dd/mm/yyyy |
(example 21/01/2013) |
|
yyyy/mm/dd |
(example 2013/01/21) |
|
mm/dd/yy |
(example 01/21/13) |
|
dd/mm/yy |
(example 21/01/13) |
|
yy/mm/dd |
(example 13/01/21) |
Also the separators in the date format can be “.”, “/” or “-“.
In the target group section,
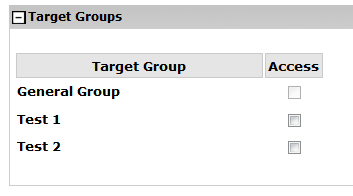
You can choose which target groups to be visible in the account. By default, the General group is visible by all users. If you want to hide some targets from a user, you need to move them from the General group to another target group and not allow access to that group.
The final section is Shared user.

If you have more than one account with us and you want to use the same username and password for all accounts this is the option that you have been looking for.
You need to enter an account number for another account and send a request. The account number can be found under Account -> Account Summary.
The administrator of that account will be notified and if he/she allows it, you will have access to that account using your own credentials. The administrator of the other account has to go to the user management section and approve your request.

Once you are approved, a new account option will appear on the right hand side of the top menu and you can easily switch between accounts.
![]()
Once you are done configuring the user settings, you should always remember to Save at the bottom of the page or the changes you made will not take effect.
If you do not have an account with us yet, sign up for a 30-day free trial to test all our services absolutely free for one month.


 Copyright 2000-2025, WebSitePulse. All rights reserved.