 Have you ever wondered why some spam filters block the emails sent from your server?
A possible reason for such problems might be that your servers are blacklisted in a DNSBL list (DNS-based Blackhole List) which the spam filters use to verify that you are not a spammer. So, to make sure the IP of your mail server is not present in most of the major blacklist services’ lists, you can use our Blacklist (DNSBL) monitoring service.
We can check your IPs against the lists of major blacklist services and alert you if your website has been listed. You can then contact the specific service and request your server removed from the blacklists in question.
Here is a quick guide on how to set up a DNSBL target:
If you do not have an account with us yet, sign up for a 30-day free trial to test all our services absolutely free for one month.
Once you are logged into your account, go to Targets -> Create New Target -> Security and blacklist monitoring, and choose the DNSBL scan.

Once you click Continue, the basic configuration will show up.

All you need to do here is enter a target label and select the correct time zone and monitoring interval. Since the blacklist providers do not update their list every minute, the lowest monitoring interval is 30 minutes. The price for such a target is $8 a month, but if you want to save money, you can choose a 12-hour interval, and the price will go down to $2 a month.
You also have an option to keep the detailed reports for every single check for more than 1 month at an additional cost.
The Continue button will take you to the advanced configuration section.

If you already have a target that monitors the specific IP address, you can select the host from the drop-down menu. To add a new IP, enter it in the new IPv4 address.
Right now, we are only supporting IPv4, but because IPv6 is gathering momentum, we will soon introduce a service that will support it.
Once you enter the IP address, you can choose against which lists to compare your address. Currently, we support 82 different lists:

You can choose a few of the lists or all of them. When we detect that your IP has been blacklisted in a specific list, you can later remove that list from the check until you manage to get your address removed from it. This way, you will not be notified again and again regarding the blacklisting.
When you select the lists and click Continue, you will go to the monitoring locations settings section. Since these lists are static and all locations receive the same information, you can only select 1, which is Los Angelis, CA.
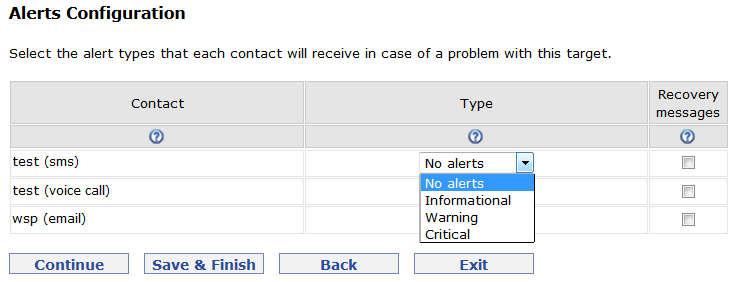
The Continue button will then take you to the Alerts configuration:

You will see all your active contacts here, and you can choose to receive no alerts, except such that contain a warning or critical or recovery messages.
Click Save and finish or proceed with the configuration should you want to set up any reports by email, scheduled downtime, dependency rules, and takeover instructions.
A typical report will look like this:

If your server is blacklisted, it will appear in red under Listed on top, and the Details link will show you exactly which service has blacklisted your IP address.


 Copyright 2000-2025, WebSitePulse. All rights reserved.