 Monitoring your website's availability and performance has proven to be a crucial part of the responsibilities of web-business owners. Knowing about a problem with your website or application on time helps you avoid possible downtimes and clientsand revenue loss. That is why we make sure to alert you in all possible ways. In this article we will introduce you to the Contact types we support, how to set them up and how to use them.
Contact Types:
- SMS
- iOS & Android device
- Voice call
- Instant messanger
- Pager
- URL
- SNMP
The email contact is one of the most used and preferred in the IT world. It is reliable and easy to set up. Here’s how:
- Fill in the new contact's name and the email address itself.
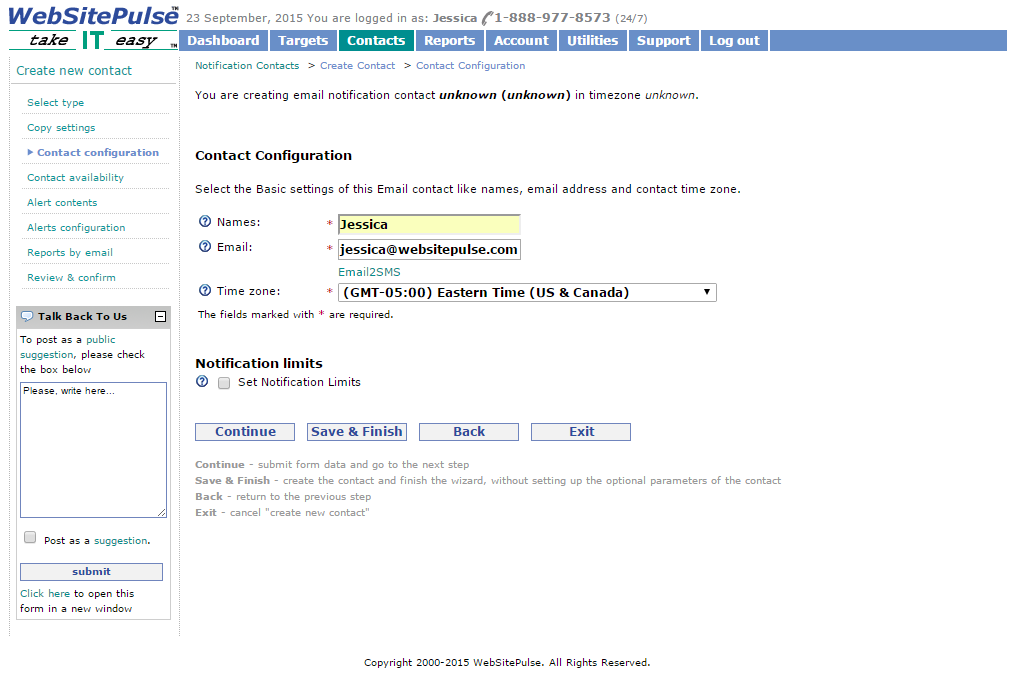
- Specify the contact's availability (this is optional – do not change those settings in case you want the contact to be active 24/7).
- Configure the alert content that you want to receive. Note that there is a default alert message for each target and alert type. You can choose to modify the content of the alerts using the tags from the list provided.
- Configure the alerts for the respective contact. You can choose between connection and content related alerts, timeout warnings and recovery messages. The “failures before sending an alert” option allows you to define how many times the target in question has to be reported down, before an alert is sent. The “Maximum alerts per cycle“ value defines the maximum alerts that will be sent to your contact after the first consecutive failure is detected. The “Alerts cycle” itself is the value, which specifies the time frame after which our system will restart the escalation schedule of the target.
- Configure the reports that your contact will receive by email. You should click the "Add new report" to create a new report or select an existing contact and copy the reports from it.
- Last, review and confirm the new contact's configuration.
SMS
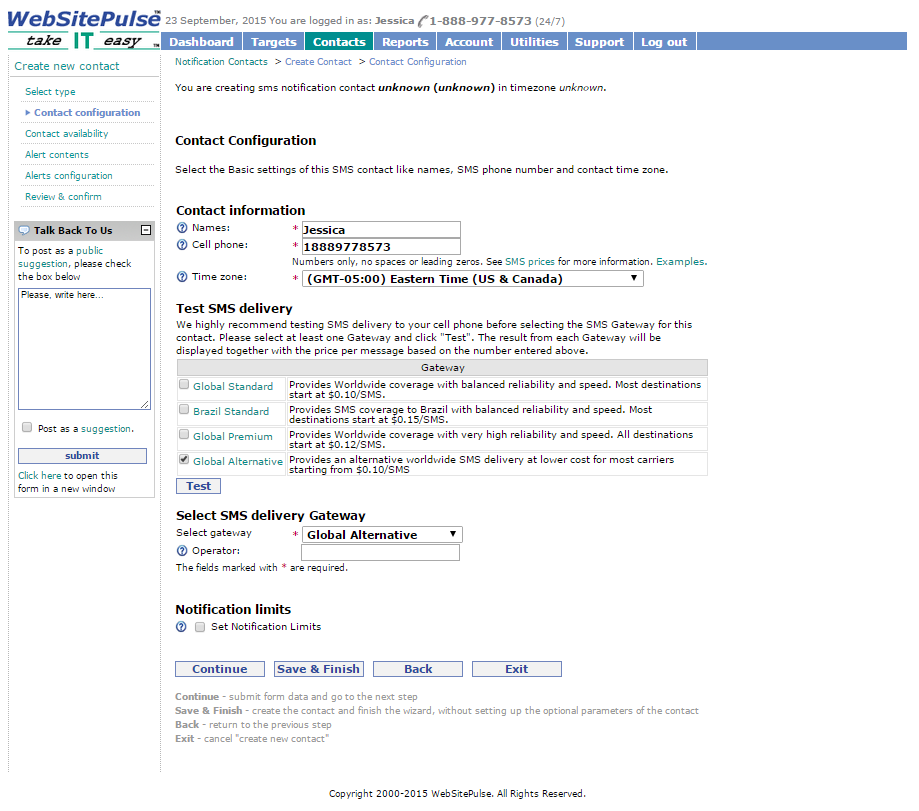
The SMS contact's configuration is almost the same as the email's, except for the first step. Here you have to provide your name and number and select your preferred SMS Gateway – currently you can chose between four options. We always want to make sure that our clients have the best configuration and that is why we recommend testing the delivery first, before choosing the SMS Gateway.
iOS and Android Device
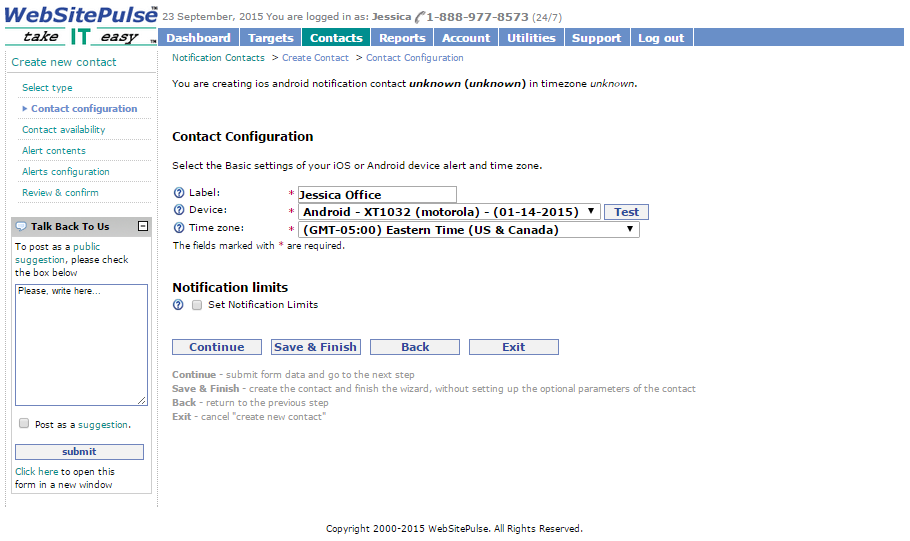
As with the SMS contact, only the first step differs from the Email contact's configuration.
- Choose a friendly name for the contact, then add your device from the drop down menu
Voice Call
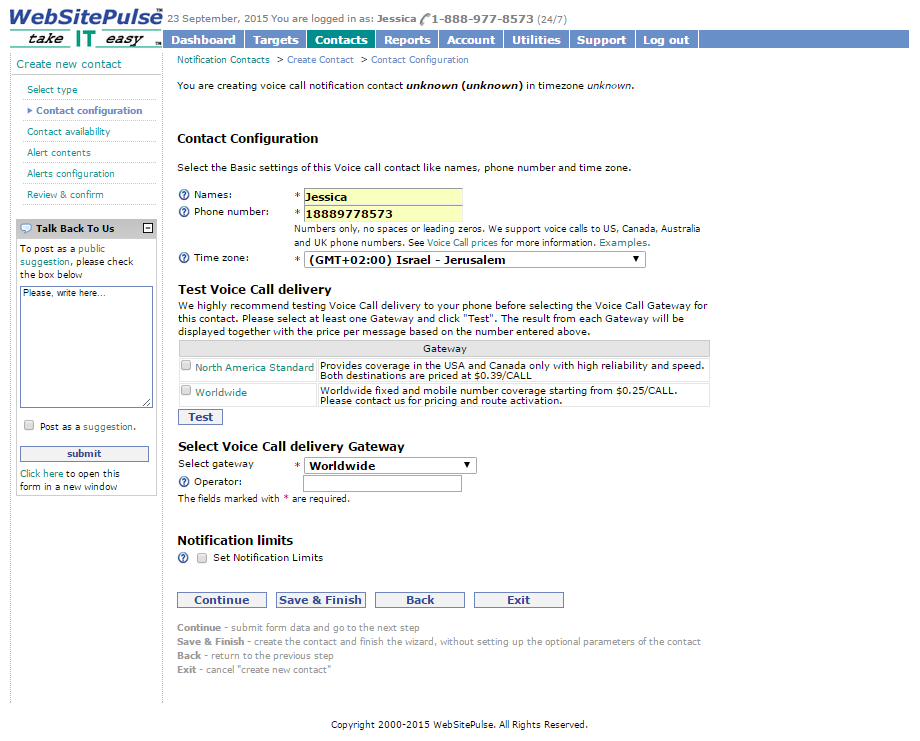
Simply provide your name and phone number and chose one of the two available Voice call gateways:
Instant messenger
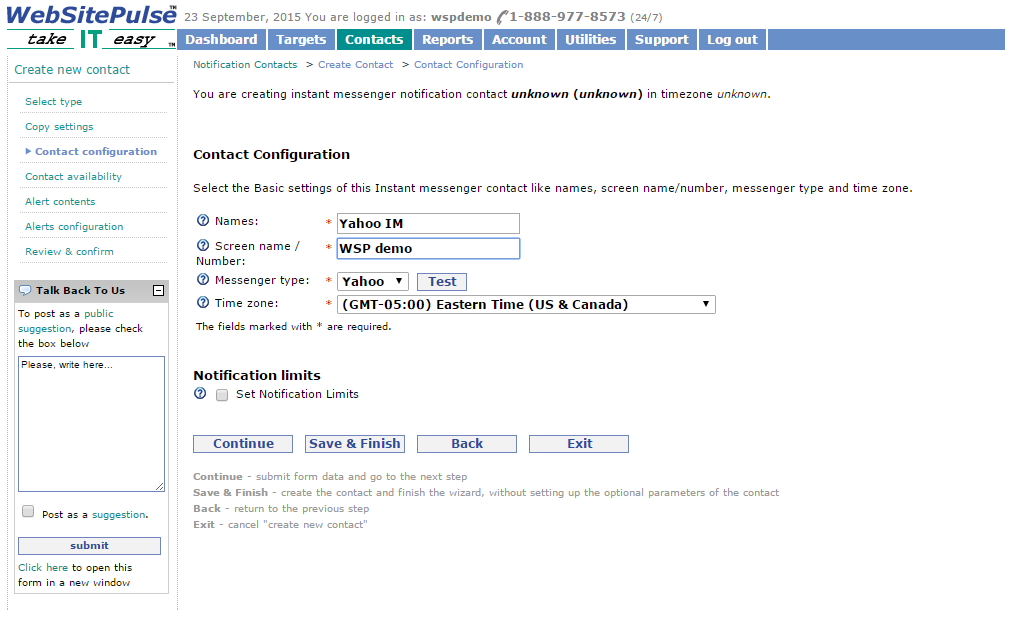
Enter your name, your screen name and choose the messenger type from the drop down menu. You can select between the following options:
- Yahoo
- ICQ
- MSN
- Jabber
- Skype
- Gtalk
The Timezone of all Contact types by default is set according to your account's Time zone, but you can change it as per your likings (e.g. in case you have a contact in another country).
Pager
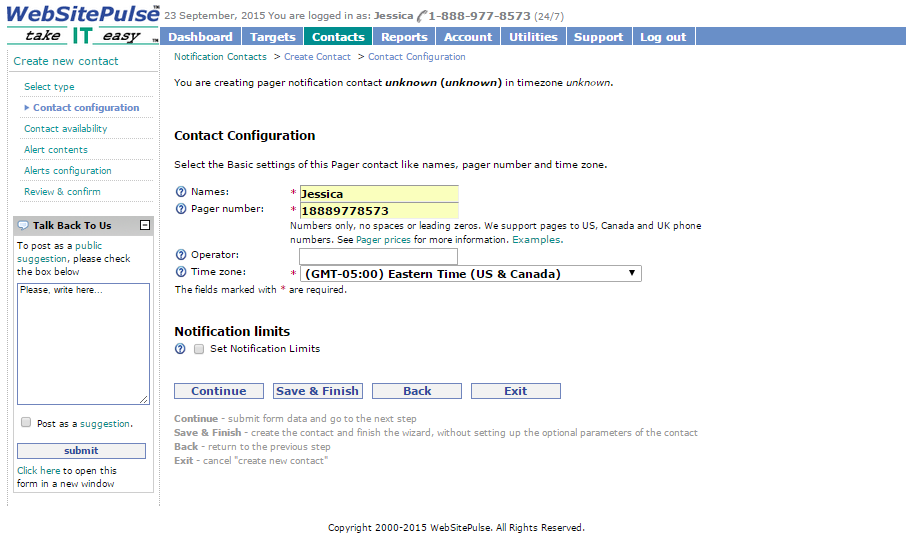
If you are still a fan of this old-school device, we are here for you. You can set your pager's contact by simply providing a name, the pager's number and the mobile operator (the last one is optional). Keep in mind that as of now, we support pages to US, Canada and UK phone numbers.
URL
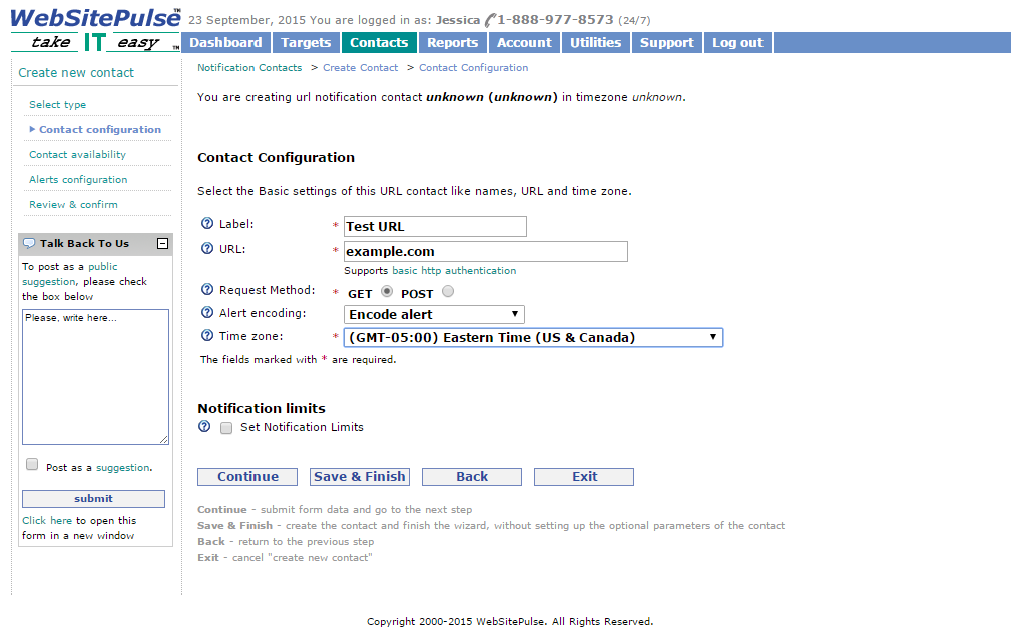
In case of an error, the URL contact will open a specific page. You can use this service to reboot your server or perform any other action that can be triggered by opening a specific web page. Our monitoring agents support both HTTP and HTTPS protocols. The URL can be requested using either GET or POST request methods. And here is how this alert method works:
The alert details are sent as a single GET or POST parameter. The parameters are appended to your URL so that you can record them in your database or process them within your web application. In order to easily process the information sent by our monitoring agent, we recommend you to modify the contact's alert contents.
SNMP
Provide the contact's name and the SNMP server. Using Trap OID is optional. Here's how this contact alerting works:
A SNMP trap will be sent to the configured server. Keep in mind that this contact type cannot receive reports by email. You can download the WebSitePulse.com MIB file (that defines the traps sent by our monitoring agent) either from the contact's configuration page or from the following URL:
www.websitepulse.com/contacts/WEBSITEPULSE-NOTIFY-MIB.txt
Note that no additional fees are added for receiving SNMP traps.
Now that we have covered all Contact types that we currently support, feel free to create the one that best meets your technical and budget needs. In case you have questions, need additional information or assistance – we are here for you 24/7.


 Copyright 2000-2025, WebSitePulse. All rights reserved.