 One of the main reasons you may start looking for monitoring tools is the need to get notified when your website is down or not performing properly.
Of course, you need to be aware of the problem before your customers do so you could take actions to avoid customer and revenue loss. After all, if your website has been down for a while without your knowledge, you are likely to experience serious business downfalls. To avoid critical situations like that, you should simply ensure you have set the alerting of your monitoring targets properly.
How Does WebSitePulse Alerting Work?
There are three main sections in the target configuration responsible for the proper alerting.
Target Status

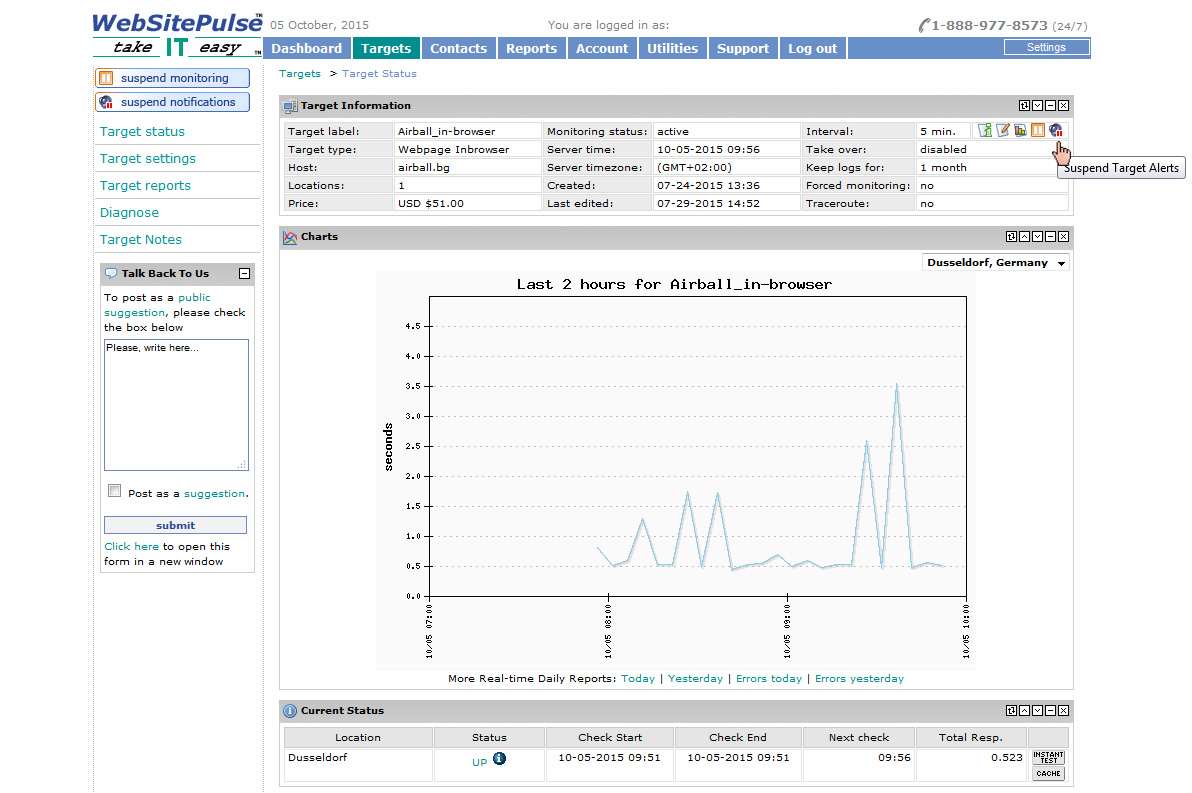
A single click on the target label will lead you to the target status – a place where you could check your current target status and a focal point to all of the target’s features. Once you reach the target status, you could check if the alerts of the target are active or suspended. It’s that little speaker icon on the right-hand side on the top of the screen. If the target alerts for the respective target are active, you could proceed to the target settings.
Alerts Configuration

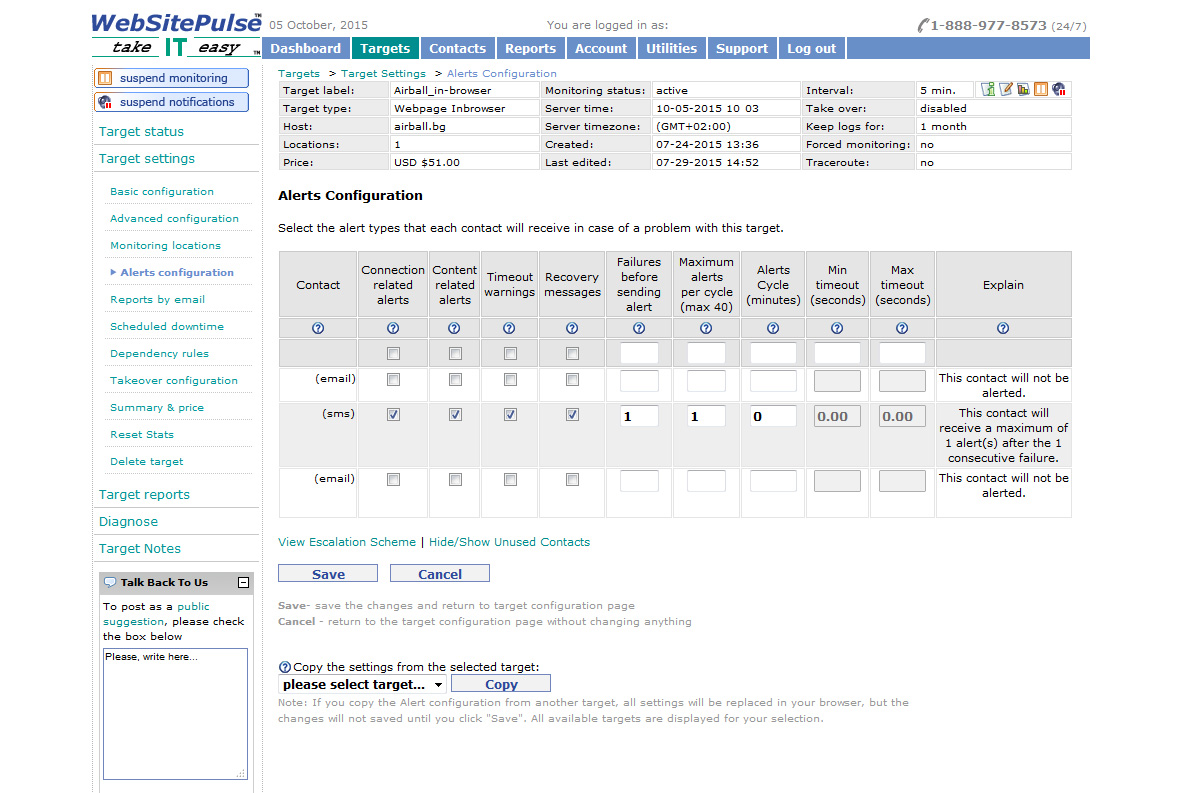
This is where you set the existing notification contact to receive alerts for the target. WebSitePulse splits the errors into three main categories, which is why the alerts are combined in three groups – connection-related alerts, content-related alerts and timeout warnings. Depending on your needs, you could use one, two or all three options at the same time. Note that if you leave the timeout checkbox for a specific notification contact unchecked, the same notification contact won’t be alerted with a timeout warning if an issue occurs.
There are several more columns in the alerts configuration table. One of them is failures before sending. The default value here is 1, meaning you will be alerted on the first detected failure. You could change that value as per your needs, but keep in mind that if you set it to 2, once we detect a failure, we will wait for the next check and will send alert to the notification contact only if the problem is detected again on the next (second consecutive) check. This feature is commonly used as a false-positive prevention system for targets with short monitoring intervals (1,2,3 minutes) and it’s not recommended for targets with monitoring intervals higher than 5 minutes.
Monitoring locations

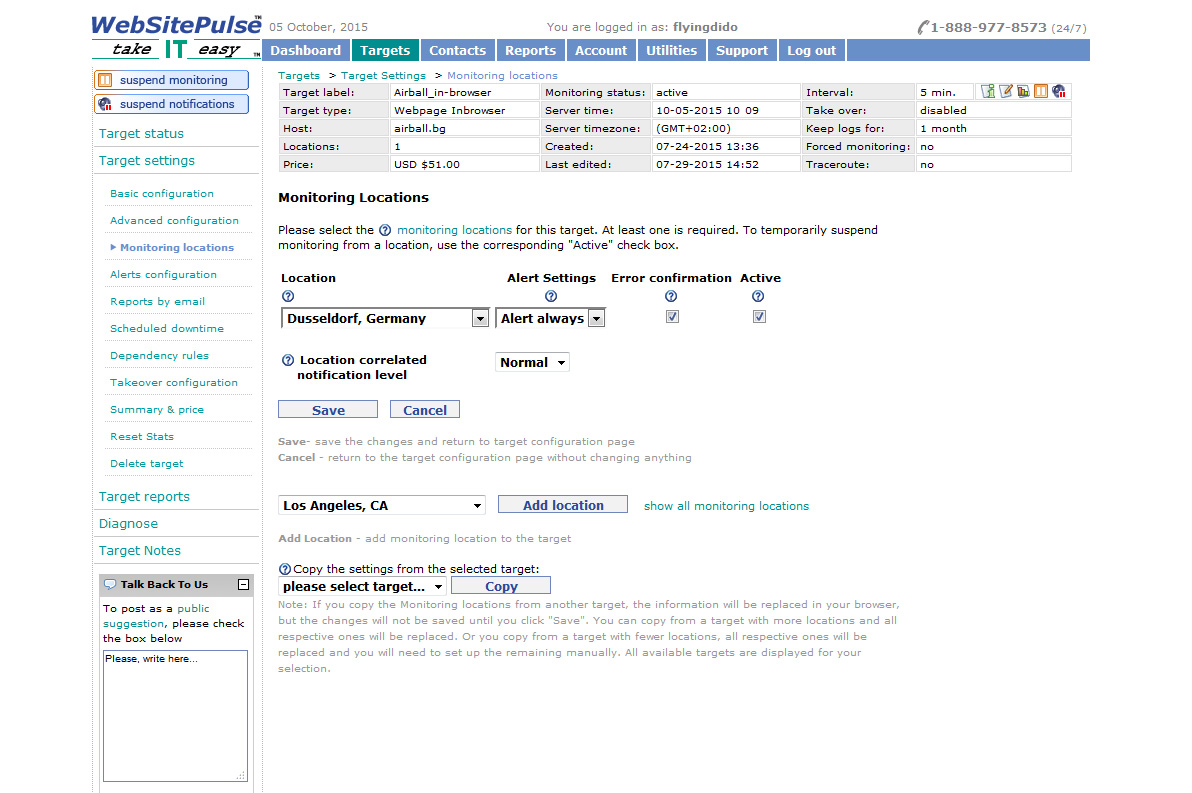
Here you select the location from which your target will be monitored. If the alert settings’ option is set to “don’t send”, we won’t send you an alert even if the monitoring location detects an issue.
While you are in the monitoring location section, you could also check the error confirmation feature. When this feature is activated, we run a secondary check from a different location to confirm the error before sending you an alert (when a problem is detected). There are cases when the email report shows you a failure for which you haven’t receive an alert. An unconfirmed error could be one of the reasons.
Now, take a look at the location-correlated notification level feature. Again, this is our false-positive prevention system, working only when your target is monitored from more than one monitoring location. If your target is monitored from three monitoring locations, this feature could be set to alert you only if at least half of the monitoring locations (in that case - at least 2 of them) detect the same error. In certain cases, you could increase the correlation level between the monitoring locations and set them to alert you only if all of them detect the same error.
Other reasons which could prevent our system of sending you an alert are:
- An active dependency rule for the target
- An active contact availability rule for the notification contact
These are exceptional cases for which we assume you are aware of since you have manually set them up.
If all features and settings described above are set properly and you still have not received your alert, contact our Support team.


 Copyright 2000-2025, WebSitePulse. All rights reserved.